SCADA Software
How to Create a New Custom Component for Windows Forms Applications
Purpose of the Component
This ATSCADA Custom Component is designed to automatically accumulate values from a source Tag (Value) into a destination Tag (Result) whenever the source Tag changes. It is commonly used for calculating total production output, total flow volume, or power consumption with support for secure industrial data management.
Detailed Implementation Steps
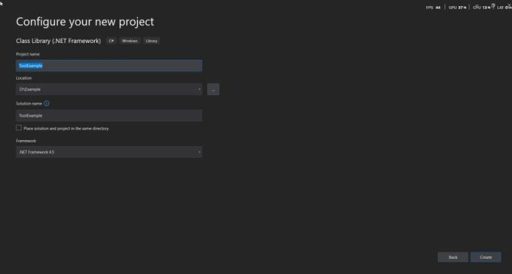
Create a New Class Library Project in Visual Studio
- First , open Visual Studio.
- Next ,select Create a New Project.
- Choose Class Library as the project type.
- Enter the project name ToolExample.
- Click Create to start the project setup.
Add a New Component and Open the Code Editor
- Right-click the project name in Solution Explorer.
- Select Add → Component.
- Enter a suitable name based on the purpose of the component.
- Right-click the newly added component.
- Select View Code to open the source code editor.
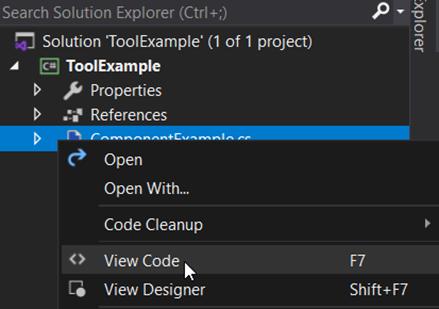
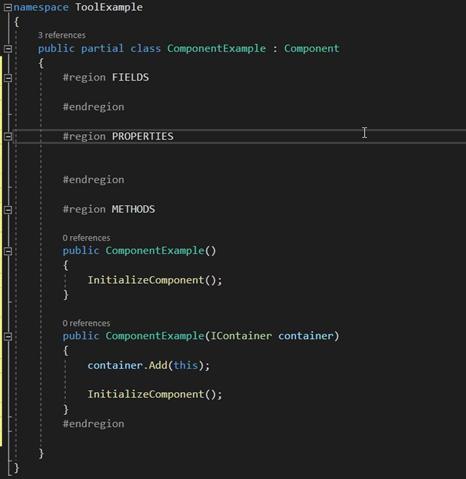
It’s recommended to divide the code into #regions for cleaner code.
Declare iDriver for Communication with ATDriverServer
- Right-click References in the project.
- Select Add Reference…
- Choose iDriver.dll and ToolExtensions.dll located in:
C:\Program Files\ATPro\ATSCADA - Click OK.
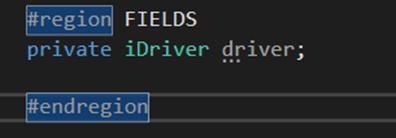
- Declare the iDriver driver class in the FIELDS region to enable communication with ATDriverServer.
- Declare the iDriver constructor in the PROPERTIES field:
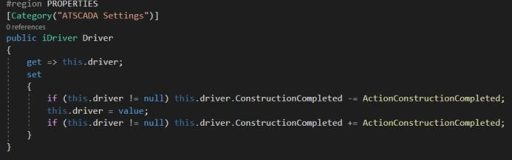
Sample code:
public iDriver Driver
{
get => this.driver;
set
{
if (this.driver != null) this.driver.ConstructionCompleted -= ActionConstructionCompleted;
this.driver = value;
if (this.driver != null) this.driver.ConstructionCompleted += ActionConstructionCompleted;
}
}
• Declare the ActionConstructionCompleted method in the METHODS field:
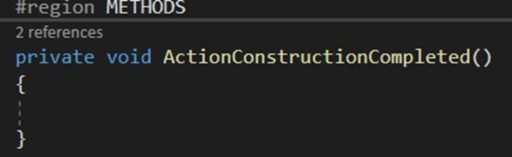
The purpose of this method is that when the value associated with the iDriver changes, this function will be called and the internal logic processed.
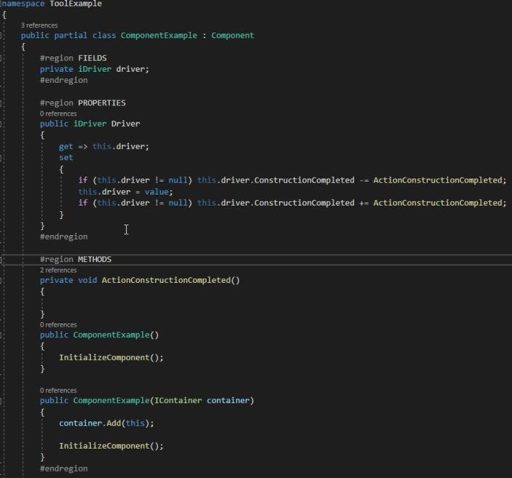
>In summary, step 4 will have the following code:
Add processing logic to the ActionConstructionCompleted function.
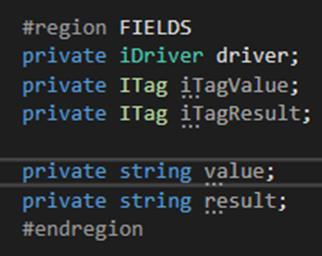
- ITag iTagValue, ITag iTagResult: The actual Tag objects for reading/writing data.
- String value, result: Temporary variables used to store values for logic processing.
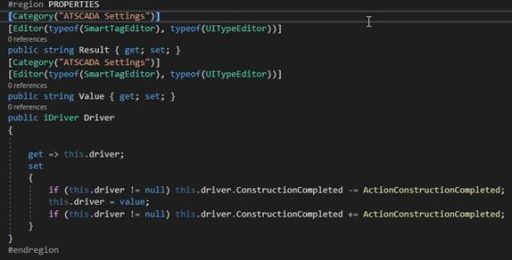
Add two additional properties in the PROPERTIES region:
[Category(“ATSCADA Settings”)] [Editor(typeof(SmartTagEditor), typeof(UITypeEditor))] public string Result { get; set; } [Category(“ATSCADA Settings”)] [Editor(typeof(SmartTagEditor), typeof(UITypeEditor))] public string Value { get; set; }- Purpose of the two Properties:
o [Category(“ATSCADA Settings”)]: First, it groups the properties into a separate category.
o [Editor(typeof(SmartTagEditor), …)]: In addition, it displays the ATSCADA Tag selection window instead of manual text input.
Final result of the PROPERTIES region:
The most important logic is located in the TagValueChanged event:
o Listening: When iTagValue changes, the system will call the callback function.
o Validation: Remove invalid values or values equal to “0” if necessary.
o Calculation: Convert the value from string to float.
o Data Writing: Use the ASynWrite method (Asynchronous Write) to update the result to iTagResult.
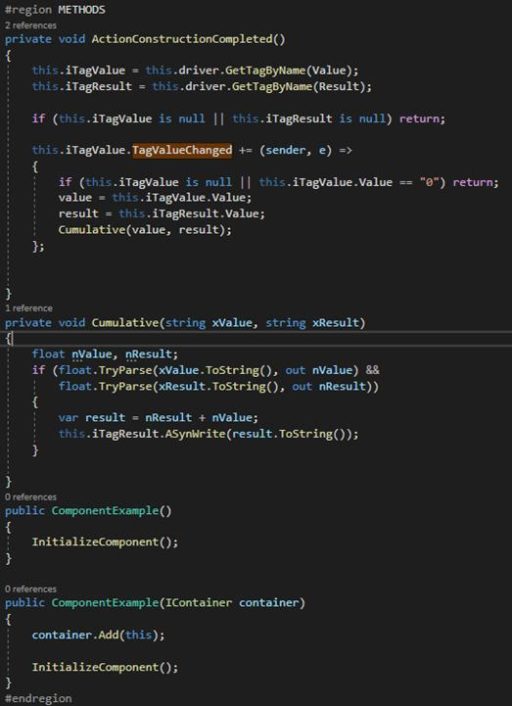
In summary, we now have a complete component with the goal of calculating the sigma value:
using System.ComponentModel; using ATSCADA;
using ATSCADA.ToolExtensions.ExtensionMethods; using ATSCADA.ToolExtensions.TagCollection; using System.Drawing.Design;
namespace ToolExample
{
public partial class CumulativeTools : Component
{
#region FIELDS
private iDriver driver;
private ITag iTagValue;
private ITag iTagResult;
private string value;
private string result;
#endregion
#region PROPERTIES
[Category("ATSCADA Settings")]
public iDriver Driver
{
get => this.driver;
set
{
if (this.driver != null) this.driver.ConstructionCompleted -= ActionConstructionCompleted;
this.driver = value;
if (this.driver != null) this.driver.ConstructionCompleted += ActionConstructionCompleted;
}
}
[Category("ATSCADA Settings")]
[Editor(typeof(SmartTagEditor), typeof(UITypeEditor))]
public string Result { get; set; }
[Category("ATSCADA Settings")]
[Editor(typeof(SmartTagEditor), typeof(UITypeEditor))]
public string Value { get; set; }
#endregion
#region METHODS
private void ActionConstructionCompleted()
{
this.iTagValue = this.driver.GetTagByName(Value);
this.iTagResult = this.driver.GetTagByName(Result);
if (this.iTagValue is null || this.iTagResult is null) return;
this.iTagValue.TagValueChanged += (sender, e) =>
{
if (this.iTagValue is null || this.iTagValue.Value == "0") return;
value = this.iTagValue.Value;
result = this.iTagResult.Value;
Cumulative(value, result);
};
}
private void Cumulative(string xValue, string xResult)
{
float nValue, nResult;
if (float.TryParse(xValue.ToString(), out nValue) &&
float.TryParse(xResult.ToString(), out nResult))
{
var result = nResult + nValue;
this.iTagResult.ASynWrite(result.ToString());
}
}
public CumulativeTools()
{
InitializeComponent();
}
public CumulativeTools(IContainer container)
{
container.Add(this);
InitializeComponent();
}
#endregion
}
}

Build & Test
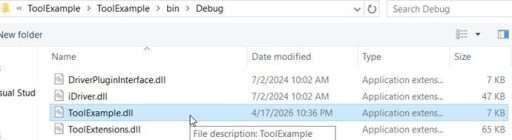
Build Project:
Press Ctrl + Shift + B to compile the library. If the library compiles successfully, you will see a log as shown below with the .dll file.

Test the library
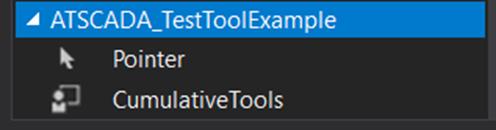
Here, create a new Windows Forms Application project. Similar to other ATSCADA Components, open Toolbox => Add Tab => Enter a name, for example ATSCADA_TestToolExample => Choose Items => Browse => Select the correct .dll file from the path compiled above => Click OK.
And as a result, we will see the name of the Component we just created in the previous step displayed in the ATSCADA_TestToolExample tab.
Configuration:
First, do not forget to drag iDriver, the heart of the SCADA Realtime system, onto Form1.
Drag the CumulativeTools component that was just added onto Form1.
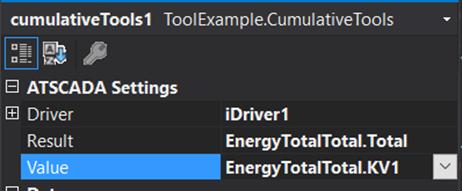
Select the component you just added and configure the properties as follows:
- Driver: iDriver1
- Value: The TagName whose value change will be used to calculate Result + this Value.
- Result: The TagName assigned as the output result.

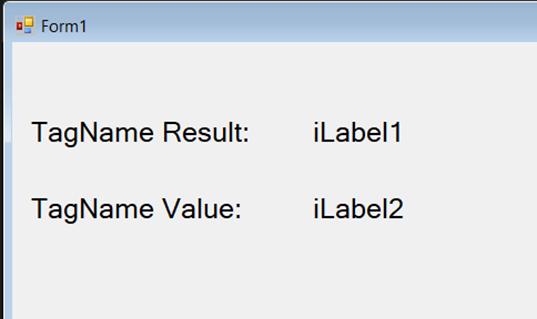
o illustrate this more clearly, you should add two more iLabels and assign them the symbolic values Result and Value, similar to the properties of the tool above, as commonly used in hospital temperature humidity monitoring systems.
Runtime
Compile and test the program.

As shown, the TagName Result currently has a value of 7776, and the TagName Value currently has a value of 1113.
Now, if we change the value of TagName Value (KV1) to 4, then the TagName Result becomes 7780, which matches the cumulative formula configured in this ATSCADA Custom Component.

Try changing the TagName Value to 20 => The result is 7800

👉 Learn More about ATSCADA Architecture

ATSCADA - Smart SCADA Software with AI Predictor & Blockchain. ATSCADA is an advanced SCADA software platform for real-time monitoring, intelligent control, and efficient data acquisition. It is ideal for Industrial IoT (IIoT), smart cities, integrated automation systems, and Agriculture 4.0. With a built-in AI Predictor, ATSCADA enables predictive analytics to detect issues early, optimize performance, and reduce downtime. The integration of Blockchain technology ensures secure, transparent, and tamper-proof data management. Highly scalable and easy to integrate, ATSCADA is trusted by businesses to enhance productivity, strengthen cybersecurity, and accelerate digital transformation.
Bài viết liên quan
ATSCADA CookBook: Complete Guide to System Architecture, Tools, Installation & Troubleshooting
The ATSCADA Training book is an essential navigation structure that helps users access all major [...]
Apr
Common ATSCADA Errors and How to Fix Them – FAQ for ATSCADA Tools and Systems
Issues Related to ATDriverServer & iTagBuilder Software Why Does ATDriverServer Not Open? There are two [...]
Apr
ATSCADA Power Management System
Requirements: There are 3 areas that require power management, including a factory, a residential zone, [...]
Apr
ATSCADA Hospital Temperature and Humidity Monitoring Alarm System Project
Requirements: The system includes three monitoring areas: the pharmacy, inpatient warehouse, and cold storage, following [...]
Apr
ATSCADA Project Deployment Guide: Create and Run Projects on Another Computer
ATSCADA Project Deployment is an essential process for transferring a completed SCADA project from the [...]
Apr
ATSCADA Blockchain Toolkit – Secure Industrial Data Management with Smart Technology
Introduction Real-world issues in industrial SCADA systems SCADA data is the lifeblood of smart factories, [...]
Apr